Skip to main content
Getting started with the Ratchet backend
The backend consists of a few files, which listen for chat messages and
send chats to all other connected clients.
Hardware and Software used
-
Raspberry Pi 4
- OS: RasPBX 10-10-2020 (Based on Raspbian 10 Buster)
- Apache 2.4.38 (Included in RasPBX Image)
-
Windows PC
- OS: Windows 10 (64-bit)
- balenaEtcher - Software for writing the RasPBX image to the SD Card
- PuTTY - SSH Terminal Software
- WinSCP - SFTP Software for file transfers
Steps to setup backend
-
Install Composer with the following commands
- wget -O composer-setup.php https://getcomposer.org/installer
- sudo php composer-setup.php --install-dir=/usr/local/bin --filename=composer
-
Create the project directories with the following commands
- mkdir /var/chat
- mkdir /var/chat/src
- mkdir /var/www/html/chat
-
Copy backend project files to the following directories
You may want to use WinSCP if you are on a Windows machine to copy the
files to the Raspberry Pi.
- app.php to /var/chat
- composer.json to /var/chat
- Chat.php to /var/chat/src
- index.html to /var/www/html/chat
-
Install Ratchet by running the following commands
- cd /var/chat
- composer install
-
Modify the /var/www/html/chat/index.html file to change the IP Address
to the Raspberry Pi's IP Address. If you change the port in the
/var/chat/app.php file, you will need to change the port in the HTML
file as well.
Change
var socket = new WebSocket('ws://localhost:8080');
to (Example shows an IP Address of 10.140.1.35 but use your Raspberry Pi's IP Address.)
var socket = new WebSocket('ws://10.140.1.35:8080');
-
Test that the backend is running properly
-
Run the following commands to start the application
-
Open two browser windows and navigate to the chat application. In this
example, the Raspberry Pi's address is 10.140.1.35.

Enter a message in one window and click the "Send" button. Click in the other window
and an alert will pop up with the message sent from the other browser window.
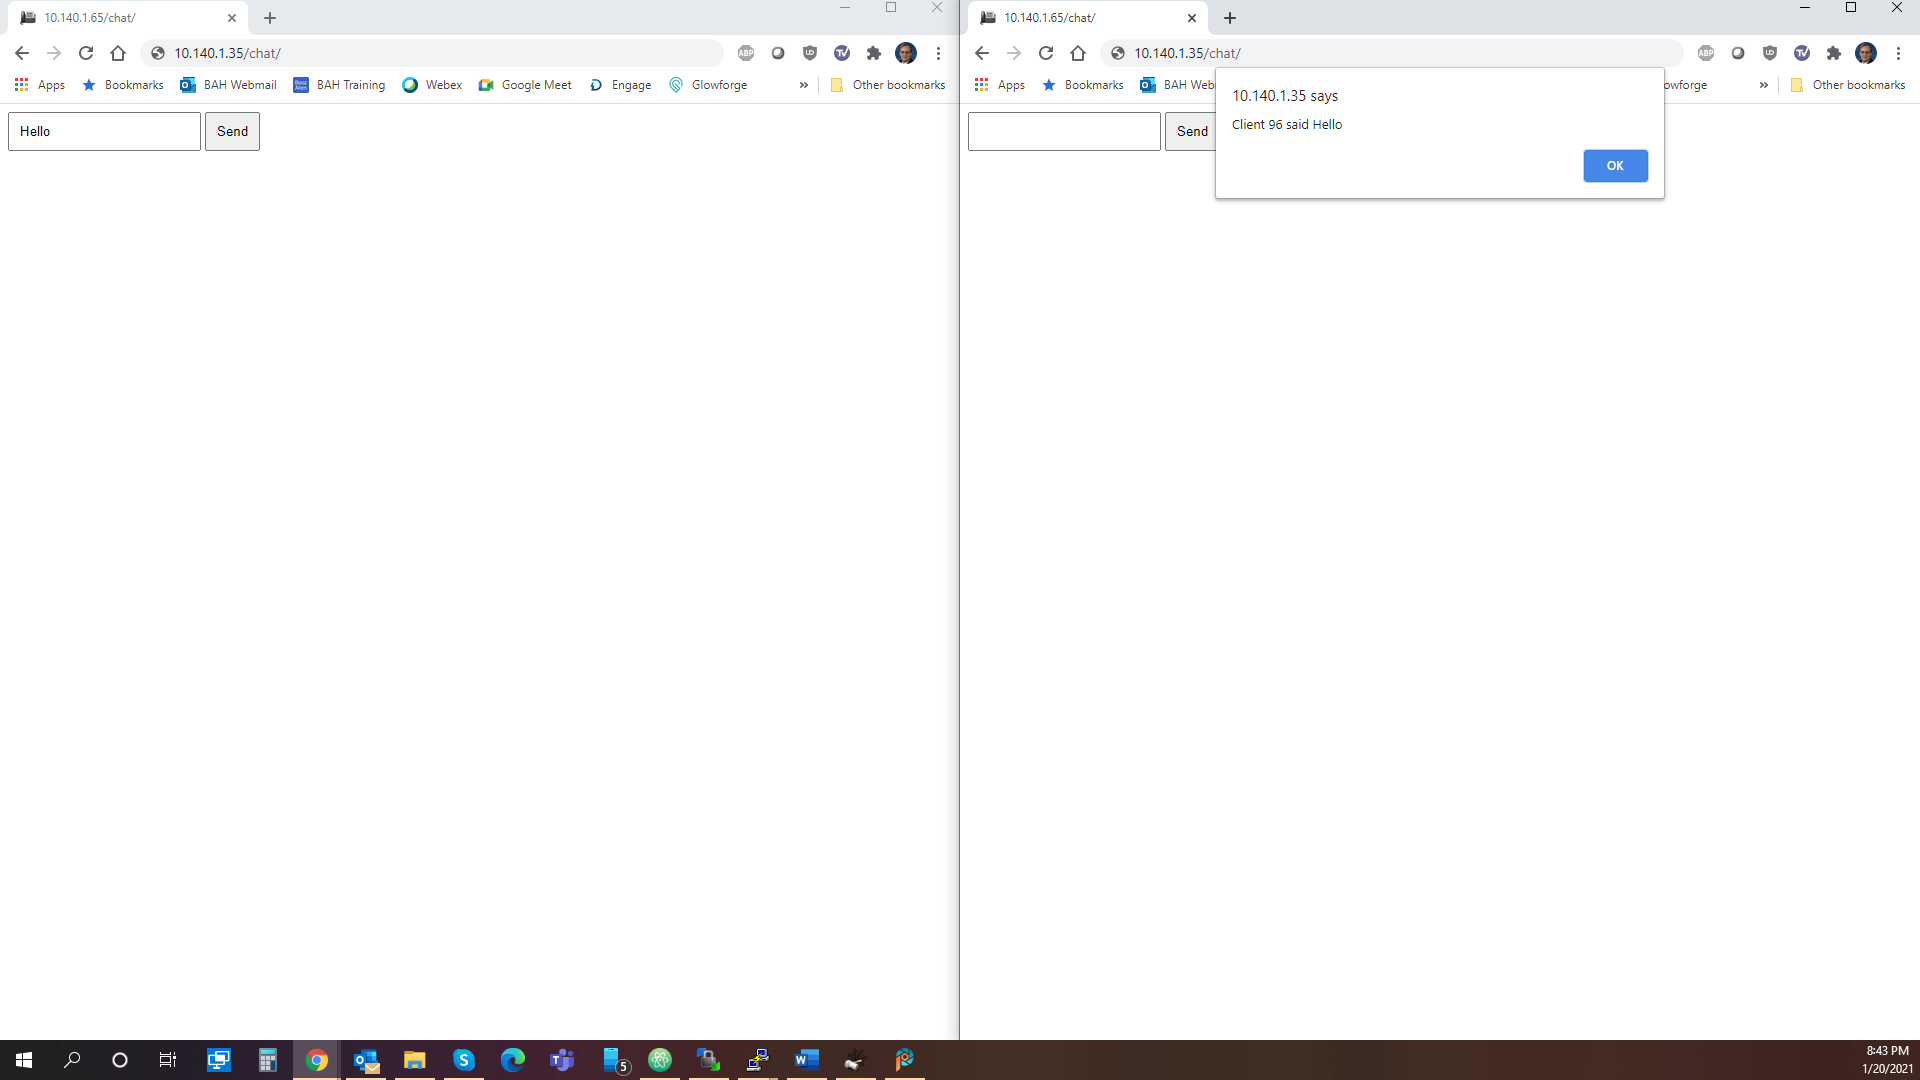
You will also see the activity in the terminal window if all is working correctly.
root@raspbx:/var/chat# cd /var/chat
root@raspbx:/var/chat# php app.php
New connection! (93)
New connection! (96)
Connection 96 sending message "Hello" to 1 other connections
- To close the chat application, press Ctrl+c
-
Use systemd to run the script as a daemon on start-up
REF:
How to Execute a Command or Script at Reboot or Startup
-
Copy the chat.service file to /etc/systemd/system/
NOTE: If you saved the chat application to a location
other than /var/chat/app.php, you will need to modify the service file.
-
Run the following commands to update systemd configuration and enable
the chat service.
- systemctl daemon-reload
- systemctl enable chat.service
-
Reboot the Raspberry Pi and test that the chat service is running.
You may check the status, stop, and start the chat service with the
following commands.
- systemctl status chat
- systemctl stop chat
- systemctl start chat
I originally ran into issues with my FreePBX installation when I followed the steps at
How to Install and Use PHP Composer on Debian 10.
The step "sudo apt install wget php-cli php-zip unzip" installed PHP 7.4 on the
system. I was not aware that FreePBX will not work with PHP 7.4.
If you make this mistake, you may work around FreePBX not working by reading what I
found and documented in the FreePBX Ticket FREEPBX-21883.
Unfortunately, the fix will break PHP Ratchet so your chat application will no longer function.
File Contents
Contents of the five files used for the Chat application, test, and service.
-
/var/chat/src/Chat.php - The interface for the Chat application
<?php
namespace MyApp;
use Ratchet\MessageComponentInterface;
use Ratchet\ConnectionInterface;
class Chat implements MessageComponentInterface {
public function __construct() {
$this->clients = new \SplObjectStorage;
}
public function onOpen(ConnectionInterface $conn) {
// Store the new connection in $this->clients
$this->clients->attach($conn);
echo "New connection! ({$conn->resourceId})\n";
}
public function onMessage(ConnectionInterface $from, $msg) {
$numRecv = count($this->clients) - 1;
echo sprintf('Connection %d sending message "%s" to %d other connection%s' . "\n"
, $from->resourceId, $msg, $numRecv, $numRecv == 1 ? '' : 's');
foreach ( $this->clients as $client ) {
if ( $from->resourceId == $client->resourceId ) {
continue;
}
$client->send( "Client $from->resourceId said $msg" );
}
}
public function onClose(ConnectionInterface $conn) {
// The connection is closed, remove it, as we can no longer send it messages
$this->clients->detach($conn);
echo "Connection {$conn->resourceId} has disconnected\n";
}
public function onError(ConnectionInterface $conn, \Exception $e) {
echo "An error has occurred: {$e->getMessage()}\n";
$conn->close();
}
}
?>
-
/var/chat/app.php - The entry point for the application that sets up the server to
listen for incoming requests
<?php
use Ratchet\Server\IoServer;
use Ratchet\Http\HttpServer;
use Ratchet\WebSocket\WsServer;
use MyApp\Chat;
require dirname( __FILE__ ) . '/vendor/autoload.php';
$server = IoServer::factory(
new HttpServer(
new WsServer(
new Chat()
)
),
8080
);
$server->run();
?>
-
/var/chat/composer.json - Information for Composer to install Ratchet and dependencies
{
"autoload": {
"psr-4": {
"MyApp\\": "src"
}
},
"require": {
"cboden/ratchet": "^0.4"
}
}
-
/var/www/html/chat/index.html - Web page to test the application to make certain that it is working
<html>
<head>
<style>
input, button { padding: 10px; }
</style>
</head>
<body>
<input type="text" id="message" autocomplete="off" />
<button onclick="transmitMessage()">Send</button>
<script>
// Create a new WebSocket.
var socket = new WebSocket('ws://localhost:8080');
// Define the
var message = document.getElementById('message');
function transmitMessage() {
socket.send( message.value );
}
socket.onmessage = function(e) {
alert( e.data );
}
</script>
</body>
</html>
-
/etc/systemd/system/chat.service - Service file to allow
chat to run as a daemon on start-up
[Unit]
Description=Ratchet Chat Service
After=default.target
[Service]
ExecStart=/usr/bin/php /var/chat/app.php
[Install]
WantedBy=default.target